I will show you how to remove double chin Photoshop.
This little problem is quite trivial, let’s see how you can fix it with the wonderful Adobe Photoshop program. To start Open our photo, File – Open (or Ctrl + O).
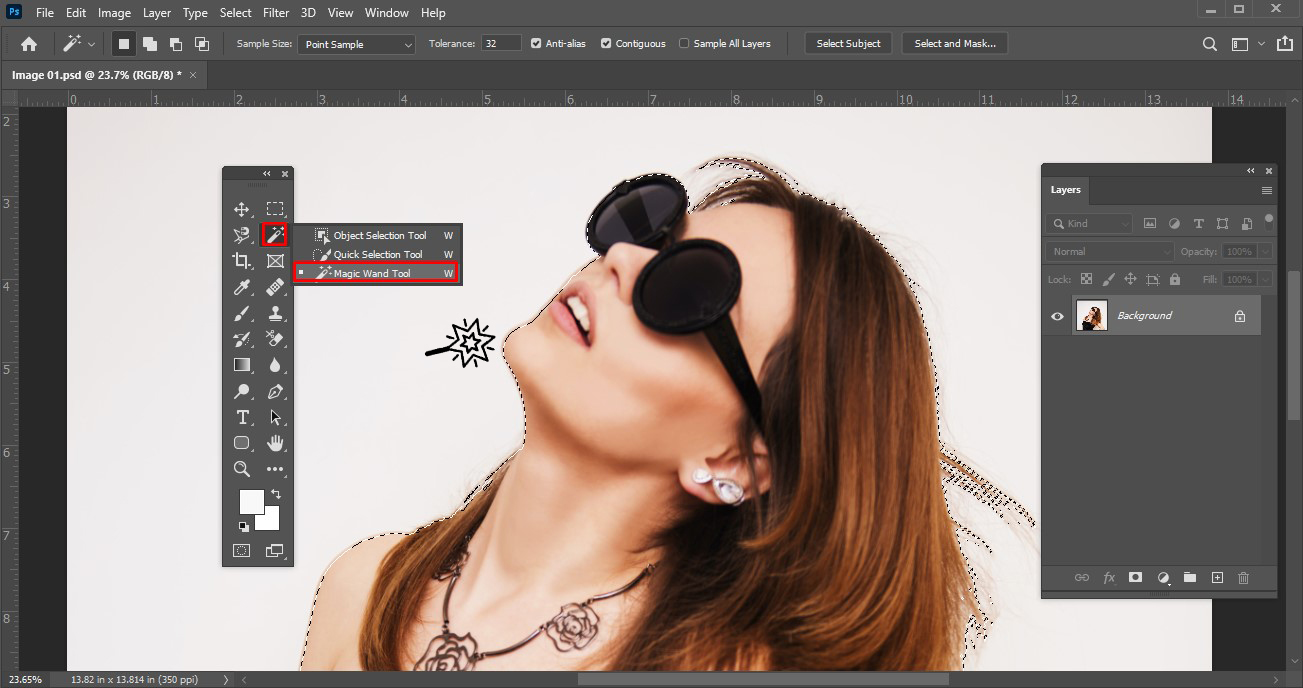
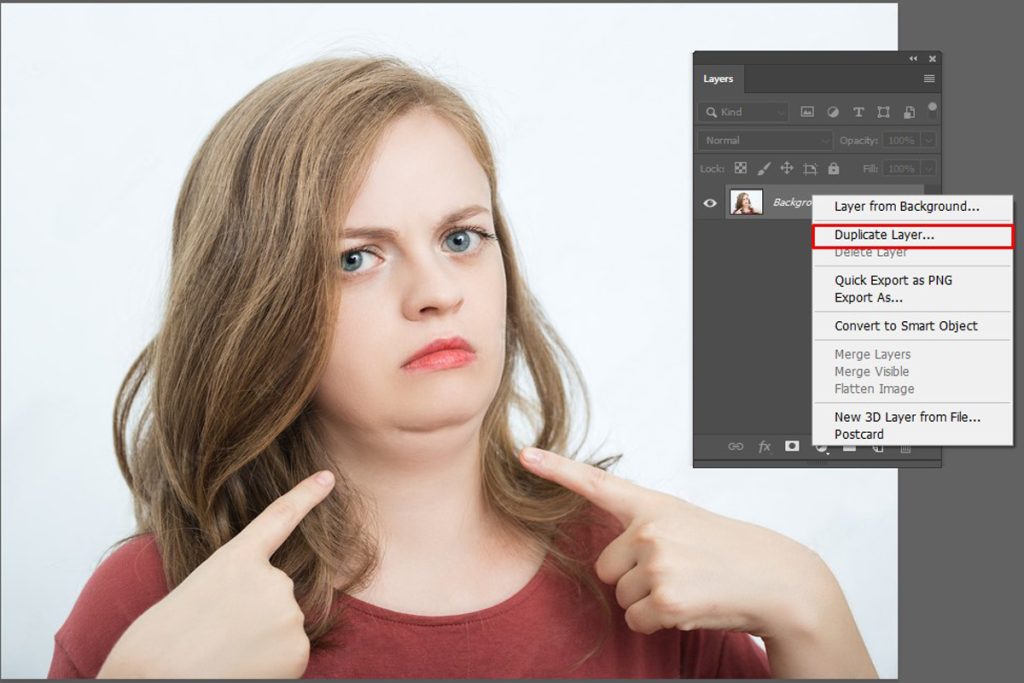
Make a copy of the layer so that, just in case, we have the original on the lower layer. To do this, open the Layers palette with the F7 key. Now in the list we only have one “Background” layer, right-click on it, select “Duplicate Layer” – Ok from the drop-down menu.
Now we are only working on a new “Background Copy” layer. Make sure it’s selected in the Layers palette. Before you start, you have to think technically about a plan of action (how to remove a double chin in Photoshop).
The task ahead is this: tighten the sagging skin on the face a little, then erase the boundaries between the first and second chin.
Correct the contour of the face
Go to the menu “Filter” – “Liquify” to adjust the jaw.

We work with the Forward Warp Tool (W).
We define the parameters of the brush:
“Brush size” (brush size) – at your discretion, depending on the size of the image itself, choose a brush size that is convenient to work with, not very small so as not to have to suffer long, but also not too large so as not to make too sudden changes.
To adjust the size, simply move the slider to the right / left until you reach the desired size. I set the brush size to 61. Brush density – 70. Brush pressure – 40.

Now gently lift the chin line so that the lower edge of the face merges with the line of the first chin.
In other words, we are trying to remove the sagging protrusion of the skin by smoothing the border between the first and second chin.
You can zoom in on the image while editing using the keyboard shortcuts “ctrl +”, move “ctrl –” away. If you have made a movement too abrupt, made a mistake, you can always go back using the key combination “Ctrl + Alt + Z“. Once you are done, click “Ok”. Here is my result.

Okay, now it remains to remove the crease between the first and the second chin.
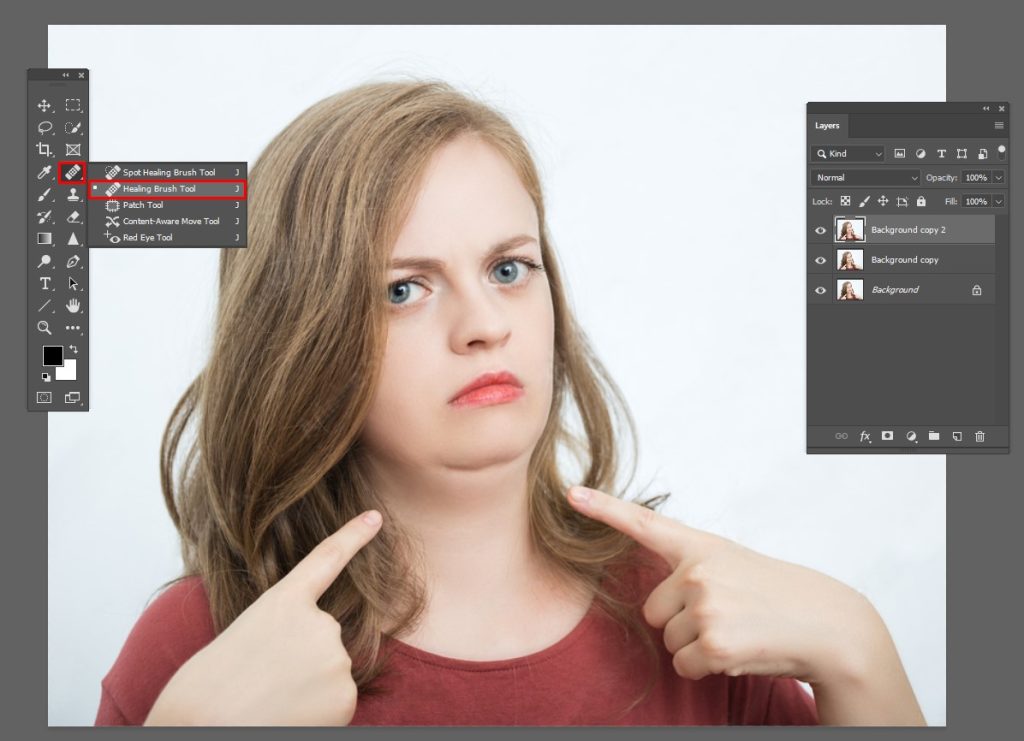
Removing the additional fold Let’s duplicate the layer again by selecting the “Copy Background” layer in the layers palette, right-clicking on it, “Duplicate Layer” – “Ok”. We are working on the top layer. Take the Healing Brush Tool (J). I have already explained how this tool works in previous lessons.
In short, it takes a sample of a piece of the image at the location you specify and overlays it on top of another area, taking into account the contents of the bottom layer. It turns out to be a kind of hybrid of two different areas of the image.
To take a skin sample, hold down the Alt key and click the mouse at the desired location.
It will be better if you take the places near the kraal. If you did everything correctly, the brush will be filled with the contents of the fragment, of which we took a sample.
Consider the difference between illuminated areas of the face and those in shadow. For them, the skin samples will have to come from different sources, otherwise you will end up with a flat and unrealistic picture.
Approaching the edge of the chin, make a selection along its outline, for example, using the Polygonal Lasso Tool (L). Work inside the selection to avoid mixing the light and dark pixels at the edge of the skin with the hair resulting in black holes in the skin.
![]()
If the bright pixels protrude slightly beyond the edge of the chin, that’s okay, just erase the excess with the Eraser Tool (E). After all, on the layer below we have another corrected chin.
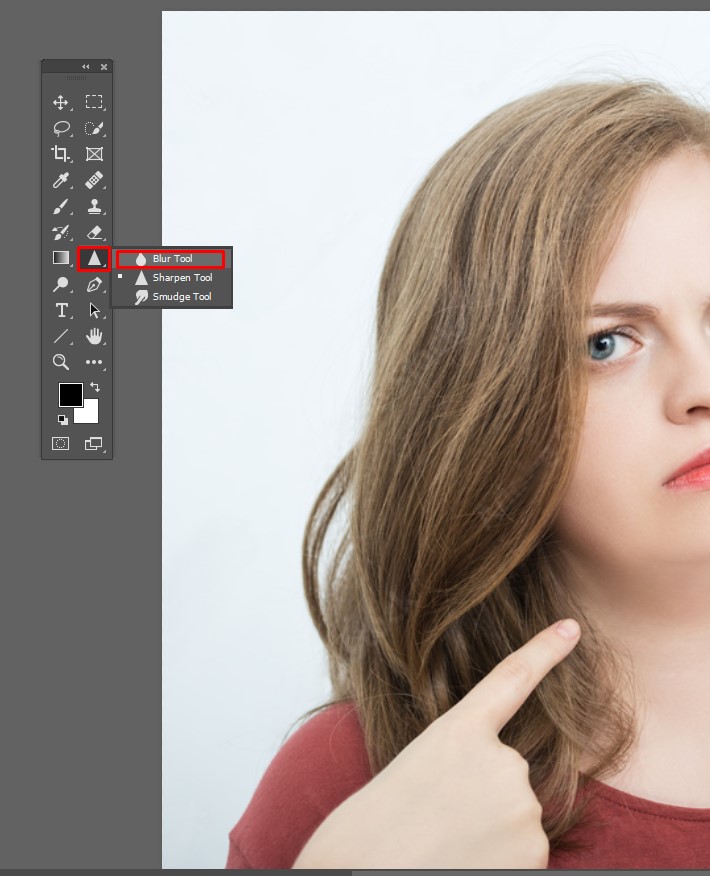
If the result is a bit uneven, you can go over the skin a bit with the Blur tool.
Please don’t overdo it, try to preserve the texture of the skin, in no case do not blur large solid areas! Just click several times in the right places to merge the disparate pixels a bit.
I only walked lightly along the edge, where there was a pixel “scale”. Here is what i have

We sweep the tracks
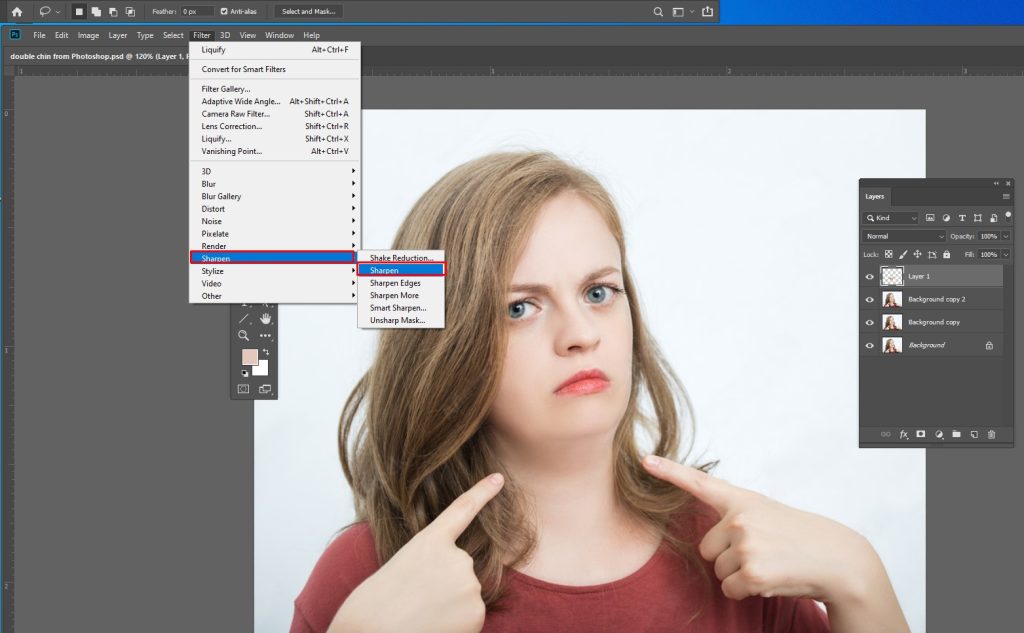
As a result of the chin transformation, we get a slight “blur” in the neck area (pay attention to the hairs under the chin, neck, lower edge of the face). We need to make this area a bit sharper so that the whole image is uniform. Roughly select the area with the Lasso Tool (L).

Right click on the selection, select “Layer via Copy” from the drop down menu, this will help us copy the selection to a new layer. Notice that a new layer has appeared in the Layers palette. Now go to the menu “Filter” – “Sharpen” – “Sharpen”. (Filter – Sharpness – Add sharpness)
It turned out to be a bit tough.
Soften this part of the image a little by decreasing the opacity of the layer in the “Opacity” field of the layers palette (F7). I bet 65%.

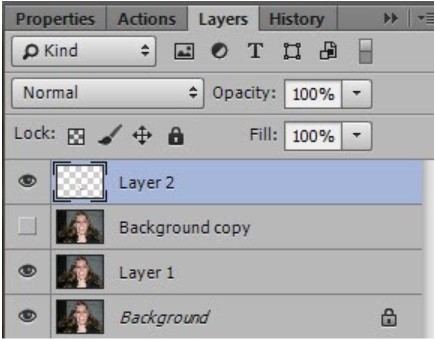
Now merge the top three layers. Being on the fourth layer, press twice on “Ctrl + E” (merge the layer with the bottom).
We have two layers left in the palette: the bottom one is the source and the second is the result.
You can compare the result with the original by turning the visibility of the top layer on and off by clicking on the eye in the layers palette in front of the layer.
So, today we learned how to remove double chin in Photoshop. I hope this lesson has been helpful to you. Perhaps you know of other ways to solve the problem highlighted in the lesson?
Good day everyone, my dear friends and guests of my blog. Today I want to tell you how to remove a double chin in Photoshop. I know many have it. Or it might not be, but the photo itself turned out to be unsuccessful, and many would like this flaw not at least not in the photographs . That’s what we’re going to do today with you.
Example 1
First I will work with this photo. Let’s start with something simpler, since here we see a face in profile.
Thus, we have removed the line that emphasizes our chin, but we have not reduced the body part itself. How do we do this? The “Plastic” filter will help us with this.
Example 2
But unfortunately, it is not always possible to get rid of some faults so easily. Let’s take a more complicated photo from a different angle. Here the girl (as is actress Kirsten Dunst, but that’s not so important) with a double chin is clearly visible. What are we going to do here?
We do everything according to the same scheme, that is, select the area where the bounding line goes (as I called it), then press the right mouse button inside again and fill- the.
What do we do next? That’s right, go to “Filters” – “Plastic”. And now we start to pull the chin higher. But remember, if your chin is higher, then narrow it down a bit at the cheeks. But don’t overdo it.
This is the result we got in a minute. In my opinion it’s pretty good. So now you yourself know how to remove double chin in Photoshop and now you can use this tool anytime.
Well if you want to study Photoshop thoroughly even if you are completely zero then I suggest you take a look at these cool video tutorials … Everything is laid out on the shelves and told in normal human language. Therefore, the study takes place with great pleasure.
And of course, don’t forget to subscribe to my blog updates and share the article with your friends on social media. And I, in turn, will try to update the content of my blog more often. Say again.
A lot of people with a double chin want it not at all, but we can help remove it only from photos. Today we are going to try with an example of removing the double chin in Adobe Photoshop image editing software. All actions are performed in Photoshop CC version .
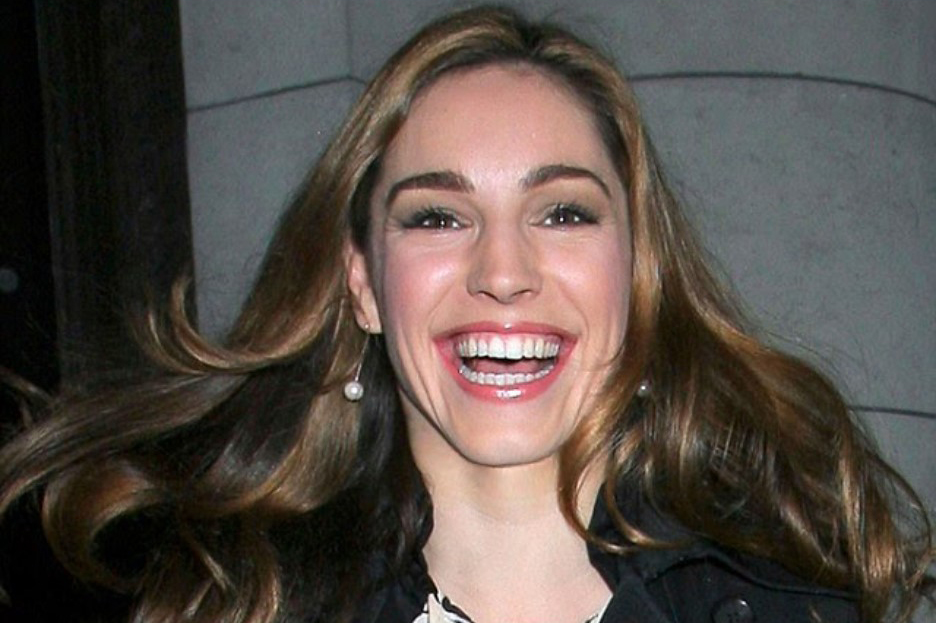
So, we need a photo of a person with a double chin. For our specific example, I took a photo of a smiling woman.
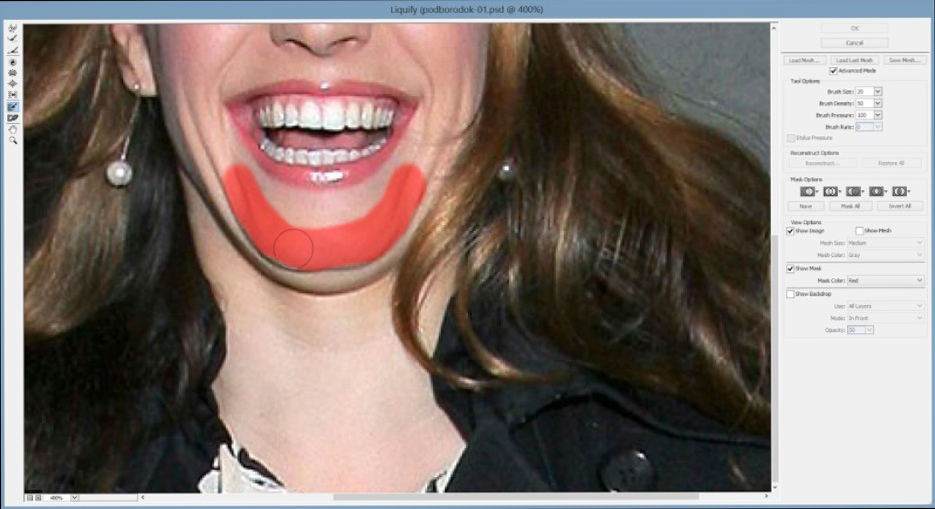
Create 2 duplicate layers using the Ctrl + J keys and go to the Filter-Liquefy menu .
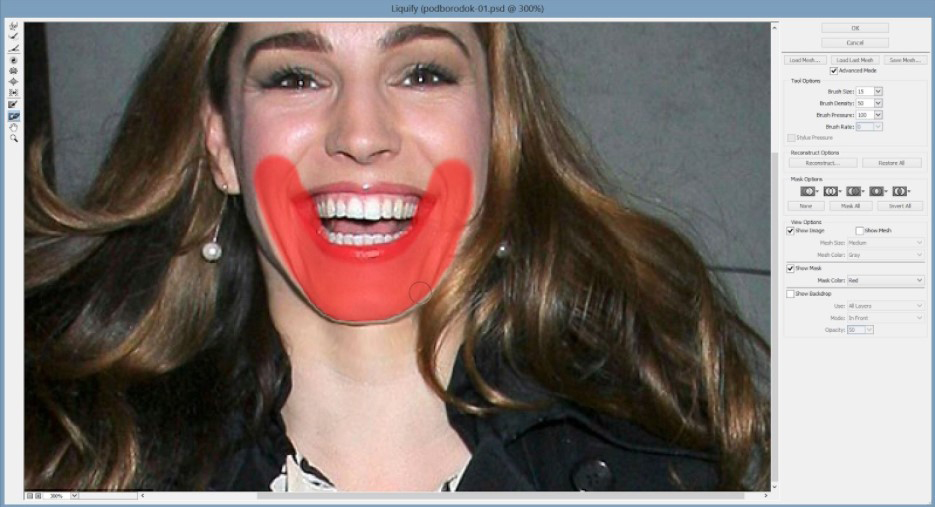
Select with the Mask Freeze Tool the part of the chin that we need to leave ( NOT double).
Then using the Front Warp Tool we move the double chin so that it moves towards our first chin.

After we finish putting our double chin up, you will see that there are still some artifacts left, as it is extremely problematic to work wonders with a single filter, and inconsistencies will be visible. To prevent this from happening, you need to add realism.
To do this, go back to our folder (click on the chord button in the Liquefy filter ) and select our chin again, but a little with the second, so that the junction of the two chins is more natural.
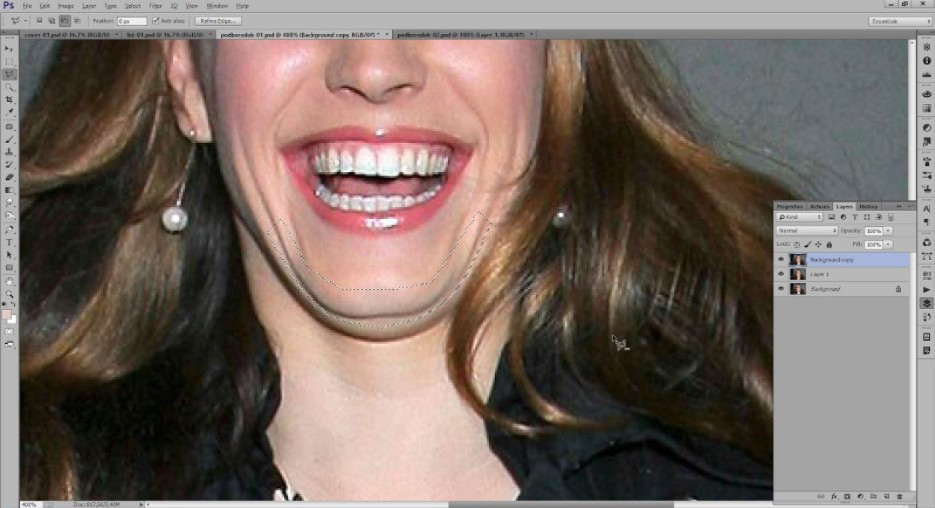
Duplicate the selection by simply pressing the Ctrl + J keys .
Now move our new layer so that the chin is one and it looks realistic.

As you can see, part of the second remains, since we chose it on purpose. It is removed using an eraser and its blurred edges, or by creating a mask (as you wish).

Here is what we have.
It should be noted that this is far from the most difficult option to remove a double chin, as there are people far worse, or rather their type of chin.
Good day everyone, my dear friends and guests of my blog. Now I want to tell you how to remove a double chin in Photoshop.
I know most of them have it. And maybe it doesn’t exist, but the photo itself turned out to be unsuccessful, and many would like it, while this lack was not at least in the photographs.
This is exactly what we are going to do with you now.
Example 1
First of all, I will be working with this photo. Let’s start with something simpler, because here we see a face in profile.
We load the Russian photo into the program, after which we immediately create a duplicate of the layer. To do this, go to the original layer and press the CTRL + J key combination.
Now take the Lasso Tool and carefully select around the crease that forms the very double chin. Just make sure you’re on the same copy of the layer you created earlier.
Then, without changing the tool, right-click on the selection and select “Fill” from the drop-down list. Then select Content Aware and click OK.
If you didn’t like it, it turned out that you have the option of trying to remove this crease using the “Healing Brush” or “Patch” tools. I talked about this in more detail in the article on how to remove acne in Photoshop.
So, we have removed the line that focuses on the domestic chin, but we have not reduced the body part itself. How do we do this? The “Plastic” filter will help us with this.
Go to the Filters menu and select Plastic (SHIFT + CTRL + X).
In the window that opens, we will have to select the pressure and size of the brush. It is possible to exert strong pressure, and adjust the size, focusing on the image itself. The size should not be small.
Now, holding the left mouse button down, start moving the convex part up, closer to the neck area. Thus, we remove all unnecessary.
Now click OK and enjoy the edited photo.
Example 2
But unfortunately, such an environment doesn’t always work, at a time when some of the loopholes are so easy to get rid of. Let’s take a more complex photo from a different angle.
Here the girl (like actress Kirsten Dunst, but that’s not so fundamentally important) obviously has a double chin.
What are we going to do here?
We do everything according to the same scheme, that is, select the area where the dividing line passes (as I called it), after which we press the right mouse button again and fill it.
But don’t overdo it.
This is the result we obtained in almost 60 seconds. In my opinion, it is quite good. So now you yourself understand how to remove double chin in Photoshop and now you can use this tool anytime you want.
Well, if you want to study Photoshop in depth even if you are not at all, I suggest you take a look at these cool video tutorials. Everything is arranged on shelves and told in a common human language. From there, the study takes place with great pleasure.
And of course, don’t forget to subscribe to my blog updates and share the article with your friends on social media. For my part, I will try to update the content of my own blog more often. Say again.
Good luck to you. Bye Bye!