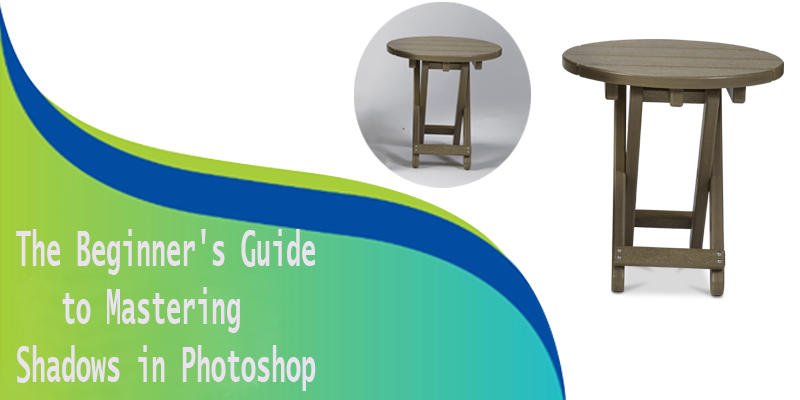
Hello! We return this time with new content remove background that we hope you find very useful and solve your questions. Let’s start!
Photoshop is the standard gold photo editing software. It has the scope to allow you to quickly retouch an old photo or create entirely new designs with ease, with basic and advanced features to serve many users. One way to fix an old photo is to remove the background in Photoshop.
Fortunately, Photoshop is now easier to use than ever, with basic photo editing that makes it easier. If you want to know how to remove a background in Photoshop, you will need to follow these easy-to-follow steps. This guide will work best for the latest version of Photoshop, but it may work for older versions as well.
Delete a background in Photoshop with the Background Eraser tool
If you’ve ever cut an object from an image in Photoshop, you must be familiar with many of the steps used to manipulate images. For backgrounds, a special tool called the Background Eraser tool can be used to remove the background of an image in Photoshop.
This is the most popular method for background editing in Photoshop and should work for older versions of the software.
This tool is one of the alternative Eraser tools in the Photoshop Toolbox menu, visible on the left side. You’ll need to hold down the Eraser Tool, then select the Background Eraser tool from the drop-down menu.

You will need to adjust the sensitivity setting in order to cleanly cut the background of the image. To do this, make sure the Background Eraser tool is selected, then click the settings icon in the top menu. This will provide you with a drop-down menu containing options to control the eraser size, hardness, and tolerance of the tool.

One of the most important settings to change is the Percentage Tolerance, which is visible in the top menu. A low tolerance rate will mean that the rubber is centered on a solid color set, while a high value will erase multiple colors at once. This gives you more (or less) precision, depending on the background you have and the image you are working with.

You’ll also want to set the Sample value to Continuous for complex funds. This means that Photoshop’s color sharpens (and erases) changes as you hold down and move the eraser tool around your image. If you have a more basic image with fewer colors, you may want to set it to Dotted or Find Edges instead.

Once you’re ready to start removing the background in Photoshop, carefully use the eraser to brush between the main object of the image (which you are looking to save) and the background (which you are looking to remove). If the settings are correct, this should start to erase the background leaving the object intact.

This will require some finesse (and possibly trial and error) to remove the background successfully. If you have problems with more complex funds, you may want to use the Select Subject tool instead.
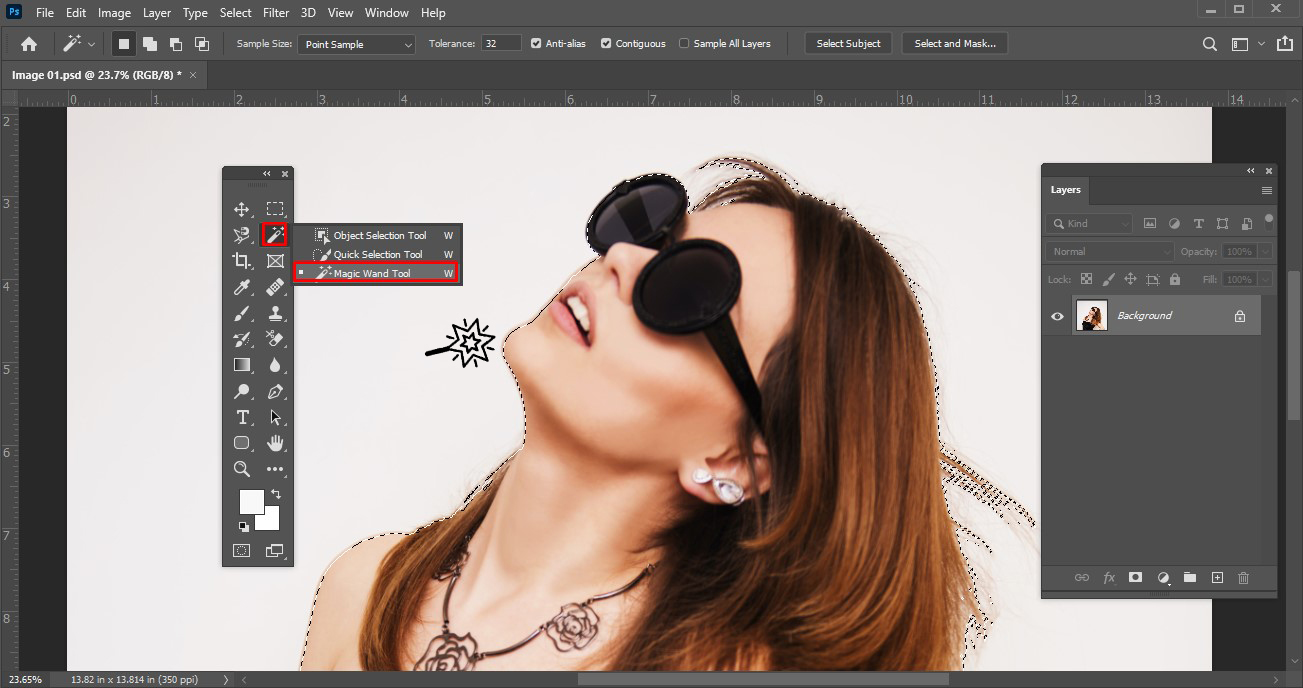
Using the Select Theme Tool to Remove Photoshop Backgrounds
The Select Subject tool is a recent addition to Photoshop’s toolbox that allows you to select the focus of an image. This works with built-in artificial intelligence technology that can help separate different elements of an image.
This is particularly useful for removing the background. Instead of manually removing a background, you can select the main subject of an image that you want to save to remove the background behind it.
To use the Select Subject tool, make sure that Select Tool is active in the Photoshop toolbox menu on the left. Click the Select and mask in the top menu.

In the Select and Mask mode, click the Select Subject button. The built-in AI will automatically select the main subject of the image, with a preview shown on the left. Adjust the settings on the right accordingly (although the default settings should work for most users), then click Okay in the right menu to confirm.
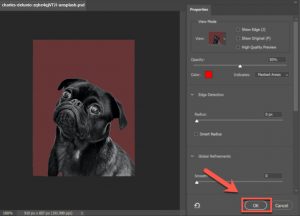
Once confirmed, the image background detected by the Select Subject tool will be removed and replaced with a white background. You can then remove the background according to your taste.
Remove to the background in Photoshop
You can remove the background of an image in Photoshop by first removing the background and making it transparent. You can add a new layer to your photo, placed behind the main theme, to create a new background.
If you use the Select Subject tool, this automatically creates a background layer that you can edit or replace. This is the best method to remove a background, but if you use the Background Eraser or an alternative method to remove a background, you can similarly add a new background layer.
Start by clicking Options> Select and Mask to access the Title Selection tool. Once in the Select and Masks menu, click Select a Title from the top menu.

The default settings in the Select Subject menu should be acceptable to most users, but you can modify them if you have problems. Press Okay to confirm once you are ready.

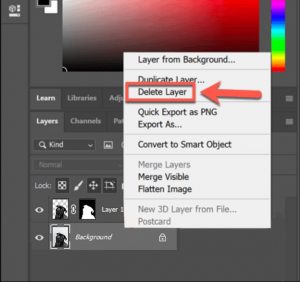
Start by clicking Options> Select and Mask to access the Title Selection tool. From the Layers tab, a layer called Background will appear in the list. You could, for example, select this layer and use the Paint Bucket tool to remove the background color with a single color.

If you want to delete the layer, right-click on the Background layer and click the Delete Layer option.
Then you can insert another image as a layer (saved to your clipboard) by clicking Layer> New> Layer via copy. To create a completely blank layer, click New Layer instead.
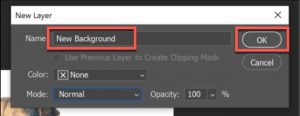
If you decide to paste an image to your clipboard as a layer, you will be prompted to name the layer first. Give the layer a name (eg New Background ) then click Okay to confirm.
If you want to create a completely new layer, you will also need to provide a name for the layer. Click Okay to add the layer.

You can then manipulate the new layer that you have inserted. By default, Photoshop should paste this to the bottom of your layered canvas. This means that the background layer will be placed under the main subject, replacing the background of the previous image.
You can then make further changes to this layer (for example, change the color or add new elements to it) using the Photoshop toolbox menu on the left.
Using alternative photo editing tools
If you don’t have Photoshop installed, you may be able to remove a background from a photo with an alternative photo editor. This can be trickier to do, but the free and open-source Photo Editor GIMP software should be able to get the job done using the magic wand tool.
If you are a Mac user, you may be able to use a free Mac photo editor like Photoscape X to remove a background from a photo. If you’re having trouble with Photoshop, GIMP, or another photo editor, you might be able to use an online service like Delete.