how to remove blemishes in Photoshop
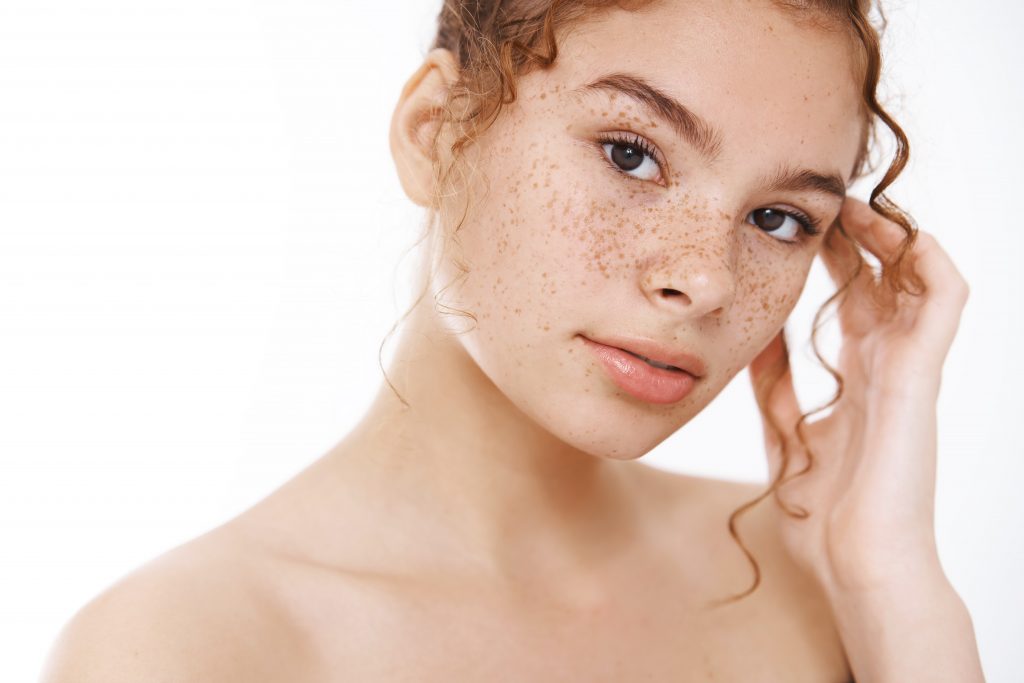
The types of how to remove blemishes in Photoshop suffered by the face are a long list, from freckles to acne. Photoshop has the power to remove almost any imperfection that the face is marked with. Scars Soften them. Moles? What moles are you talking about? Even a grain is not Photoshop safe.
How to remove blemishes in Photoshop take a look at these tools.
How to remove blemishes in Photoshop
Photoshop has some incredibly smart tools. So smart that one day they could be taking over the world. Well, maybe not yet, but some tools can remove blemishes automatically and manually. Those tools are the Spot Healing Brush and just the Regular Healing Brush. Both are extremely useful and have their own application.
Is that how it works:

1. Open your file CTRL+O on windows then select Folder name and open image.
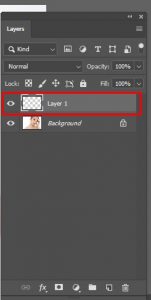
2. Start by creating a new layer. Either click the New Layer icon or press and hold Shift + ALT + CTRL + N on Windows or Shift + Option + CMD + N on Mac OS. Select your new layer.

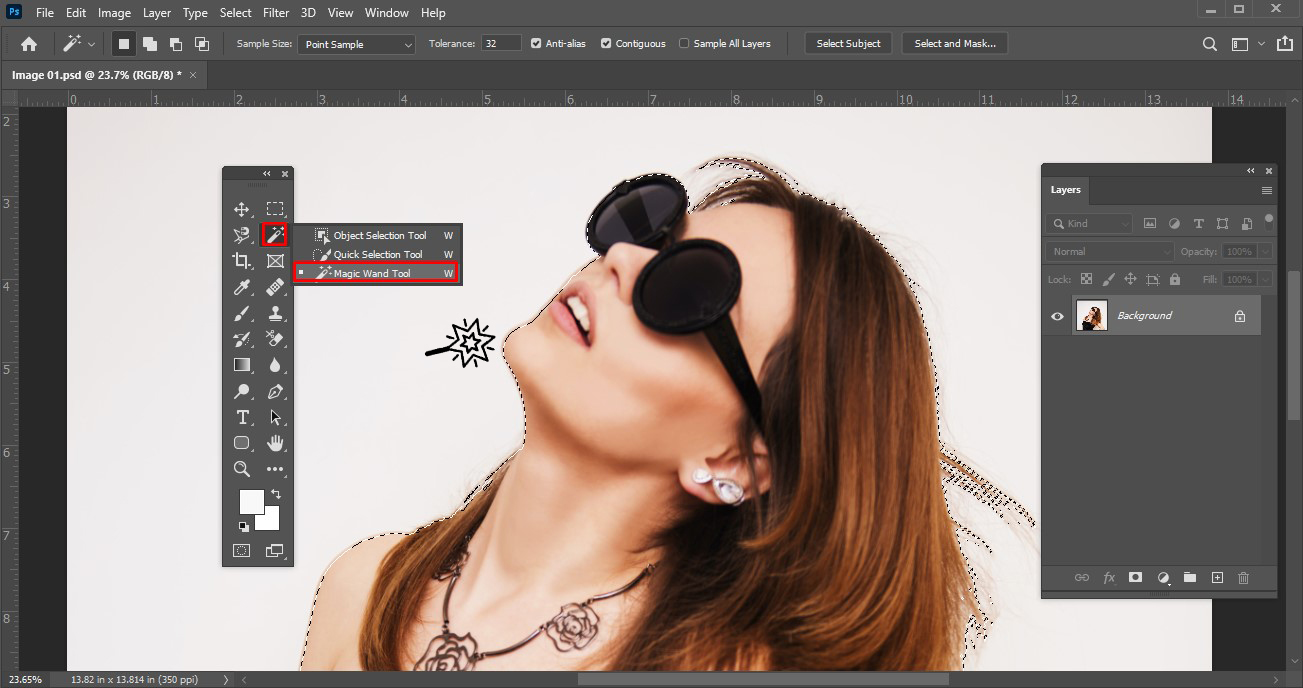
3. On the toolbar, choose the Healing Brush Tool
![]()
4. At the top is a set of parameters. Set the Type to Content-Aware, then place a checkmark next to Show all layers.
5. Select your new layer. Now take a Spot Healing Brush and “paint” over the spots.
There is a downside to using the Spot Healing Brush: the texture used to cover the blemish, the swatch point, is chosen for you. Generally speaking, it is great to choose a sample point that blends better with the surrounding area, but it is not perfect.
In the event that the texture doesn’t quite fit the surrounding area, you’ll want to fix it with the regular Healing Brush. By using the normal version, you have better control over where the sample point comes from.
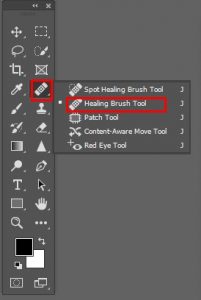
6. This time choose the Healing Brush Tool. It’s just below the Healing Brush.
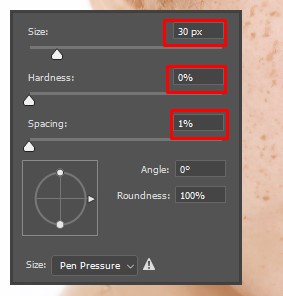
7.Than mouse Right Button ,Tool size 30,Hardness 0%,
7. First, you must choose a sample. To do this, while handling the Healing Brush tool, hold down ALT or Option and click the area that you think matches the surrounding area of the blemish.
8. With a sample now chosen, brush off the stain.
You are probably inclined to cover up every flaw. Do you want some advice? Do not do it. Removing too many blemishes tends to leave a false image. You risk someone’s face looking too soft, which is unrealistic.
Special care should be taken while removing the spots in the photo so that the texture of the facial skin does not lose its quality. We will move towards work keeping in mind the texture issue.
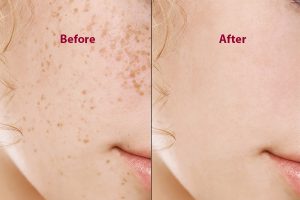
Here’s a good rule of thumb: If a stain is going to fade in two weeks or so, remove it. If the stain is, say, a small scar, leave it in. It may seem counterintuitive, but small scars and beauty marks are features that provide a genuine image. Nobody is as smooth as a Barbie doll, you know?
Also, be careful when extracting from certain sample points. For example, if you are editing an area that is shaded, do not extract a sample point from a brighter texture. Finish by drawing a very ugly mark on your image that shows. The same can be said about drawing sample points from a shaded area and applying them to a brighter texture. This also applies to areas that are in focus and out of focus; do not mix the two.

Finally, finish our work then show the image beautifully.

