Welcome to this tutorial. Today we will explain how to put a head on another body in photoshop or vice versa.
The typical photoshop montage.
We will start by looking for a photo of someone to attach our faces to. I have chosen Rafa Nadal on the cover of a Nike ad.

We open the photo of the body and the image of the fact that we want to add. In my case, this.

We drag the photo of the face to the picture of the body, or if we don’t want to remove it from the image of the beginning, we go to:
Selection > All
Edit > Copy
We return to the photo of the body and:
Edit > Paste
We already have the image with the face and the body. Now with the move tool (V), we move it until we place it on top of the fact that we are going to replace it, as we will see in the following images:
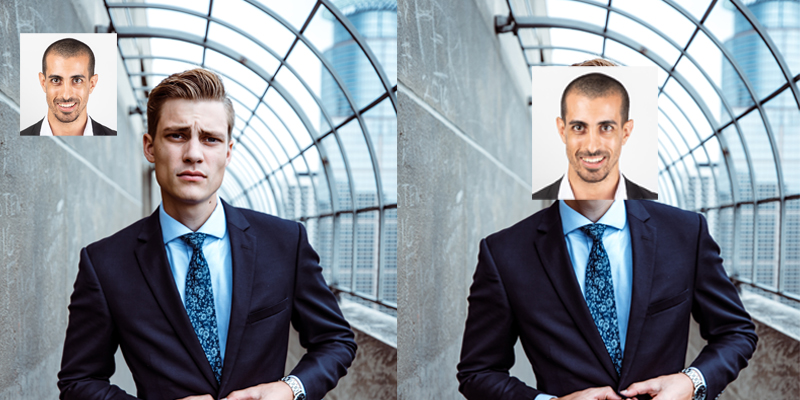
Once your face is placed on the one we are going to replace with the Eraser tool, we will erase the contour of the fact that we are going to remember so that it looks like the following image:

Once we have reached this point, we only need to place the face in its place, and we will adjust the size with the Free Selection Tool (Cntrl + T)

Once the image has been attached to its correct size, press Enter, and we will see that the head is in place but does not match the skin tone much. To make it fit perfectly with the skin, we will follow three steps: Levels, Hue/Saturation/Brightness, and Noise.
- Levels
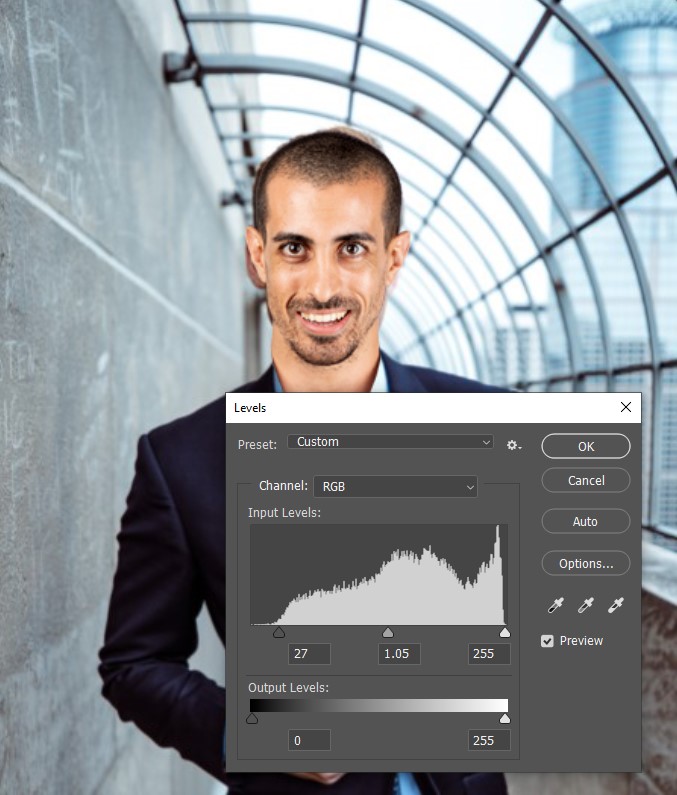
To change the levels of the face, we go to:
Image > Adjustments > Levels or Cntrl + L
We are testing values to look a bit like the bodies. In my case, I have used 73 – 1.00 – 255
- Hue/Saturation/Lightness
Now we will see that it does not quite resemble the body. In this step we go to Image > Adjustments > Hue/Saturation… or Cntrl + U
We tweak these three values to make it look like the body. In my case, I have used the following values:
- Request: +6
- Saturation: -1
- Brightness: 13
This depends on each photograph.
- Noise

In the last step, we see that the image is a little more “out of focus” than the body. To fix it, we will add noise by going to Filter > Noise > Add Noise.
We will put a low value. In my case 3.72px

Once this is done, we will have our faces in another body.

I hope you liked this tutorial.

