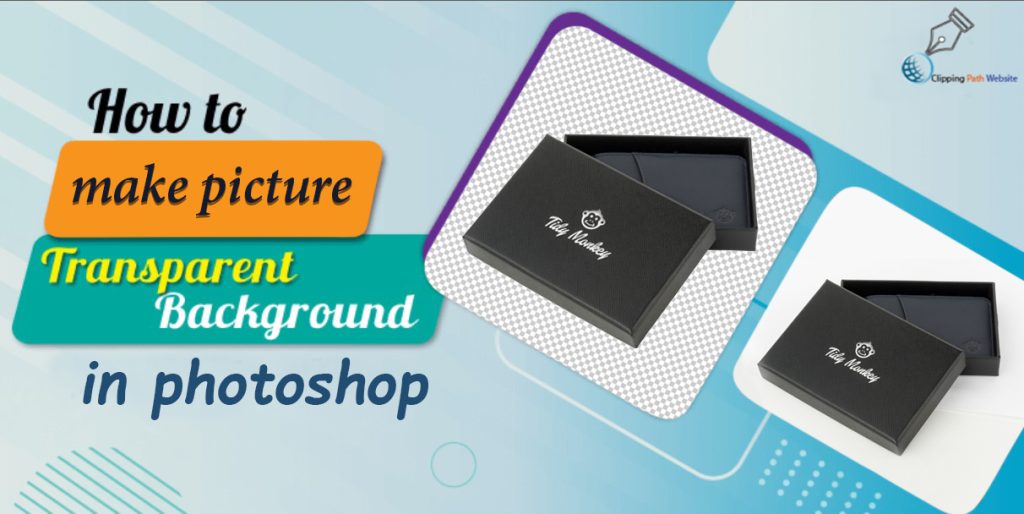
Knowing how to make picture background transparent in Photoshop will give us a variety of unique opportunities that we can find to make our image amazing and attractive. You can set your bright background image on any transparent background you want. This method works best if you have product images because these images often need to be set to a different background. It can change the look of your photo drastically and make your photo look amazing.
So seizing those opportunities where you can use your product image wherever you want by building a transparent background in photoshop can give you a limit on your competitors. In this photoshop tutorial, we will learn how to make picture backgrounds transparent in photoshop using simple steps.
How to create a clear background image in Photoshop
It does not matter if you are a photoshop expert or a beginner in photoshop, the method we are going to learn today is very simple and straightforward. By following this tutorial you can easily edit your photo and make the picture background transparent brighter.
Make picture background transparent
Step 1: Open your photo in Photoshop
First thing first !!!
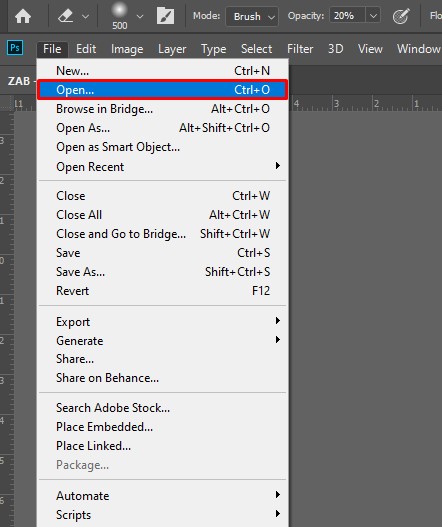
Open your product image on the photoshop artboard. To do this you can go to the menu bar and select File → Open and navigate to your files, select a file, and click Open. Or you can just drag and drop your image onto the artboard directly to open it.
Step 2: Create a duplicate layer

After uploading the image it is time to create a duplicate layer from the first layer so that later we do not waste the original file with some confused and intermediate editing ability. To create a duplicate layer click on the first layer and select Layer> Duplicate Layer, or select Duplicate Layer in the Layers panel. Say the duplicate layer, then click OK.
Step 3: Select
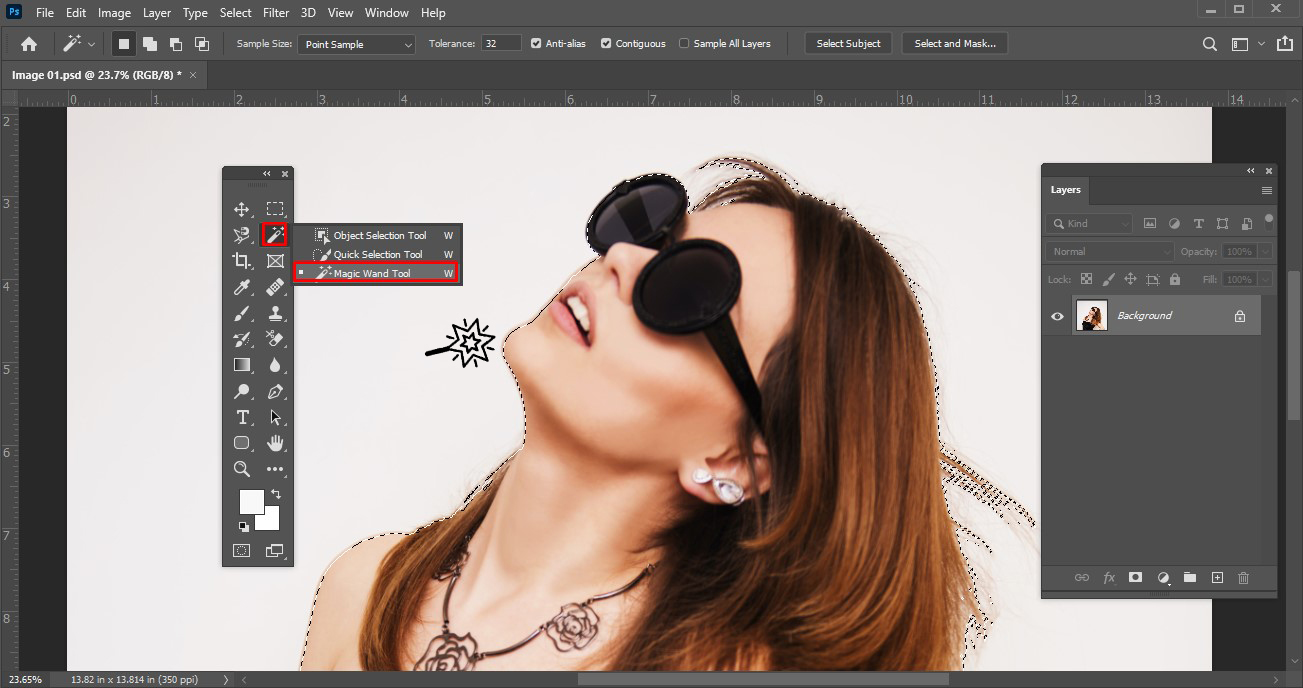
Adobe photoshop cc offers many different selection tools and they are all easy to use. You can use anyone in this tutorial but I would suggest you go with the magic wand tool.
Apart from the magic wand tool in Photoshop, you can use these tools of choice as well.
Object selection tool,
Lasso tool
Quick Selection Tool
A pen tool
Okay as we will use the magic wand tool in our selection, let’s find the tool and select it to get started. You will find a tool in the toolbar on the left as well as other tools.
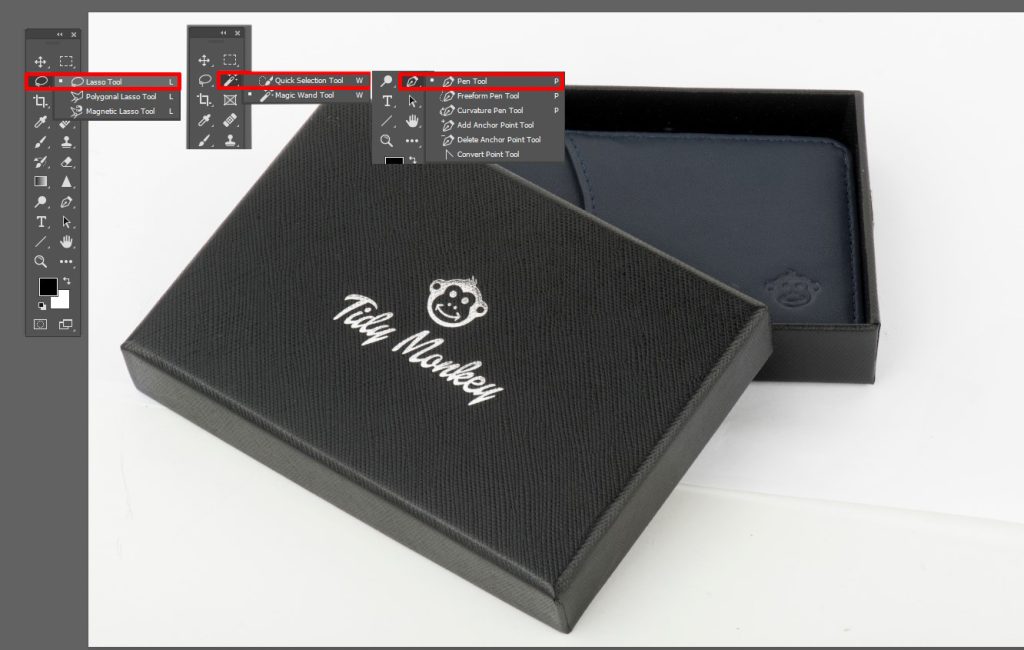
Select the Magic Wand Tool and under the menu bar click on the title option selected. Photoshop will automatically select your photo theme with the help of its AI. It will select almost exactly but there will be little space where the tool will miss.
Zoom in and find those locations, then use the options and options to adjust them. There will be other areas where the tool will pass the selection. You will find the selection, unselecting options in the lower-left corner of the menu bar.

Adjust the selection according to your need. Many of the tools in Photoshop selection offer this custom so if you use other tools don’t worry at all.
Step 4: Undo selection
After completing our selection section we will select our theme and now we can do anything with our selected section. But in this tutorial, we will make the picture background transparent and more visible using photoshop. So now we need to change the selection from our article to the background.

To change the selection simply hold SHIFT + CTRL and press Me or you can go to the menu bar, click Select menu, then in the drop-down window with different options click the Inverse option.
Step 5: Wipe the background
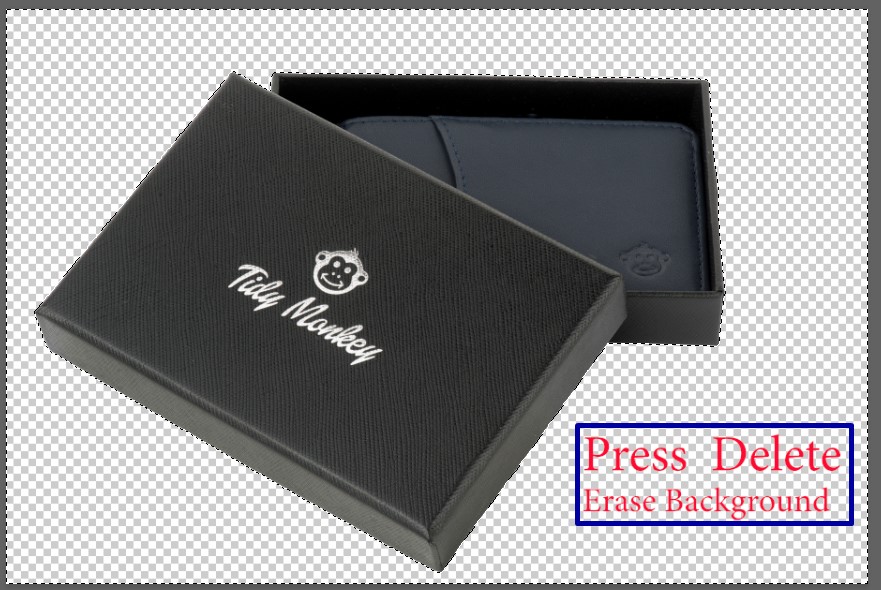
Now that our domain has been selected, click the Delete button to clear the background. Now your image background will be clear but if you save it in .jpeg format, you will not get a clear background. So how do you pull out a background image that shows through? We will see that in our next step.
Step 6: Adjust your web format
After removing the background we will have our own clear background image file but we must make it a web-friendly format as we will use it in an online forum with a different domain.
Making the background shine in photoshop is the first step in producing a product image in a web-friendly format. Before we go any further we need to know what web design is in photoshop and how to know if your image is saved in a web-appropriate format.
PNG-24 is an ideal web-friendly image format. So when you save your file you should select PNG-24 to create a beautiful background image that shows through. The format ensures multiple layers of display across. So when you add your product to the Amazon product listing platform or other online product listing platform, your image does not receive any “halo” pixel effects.
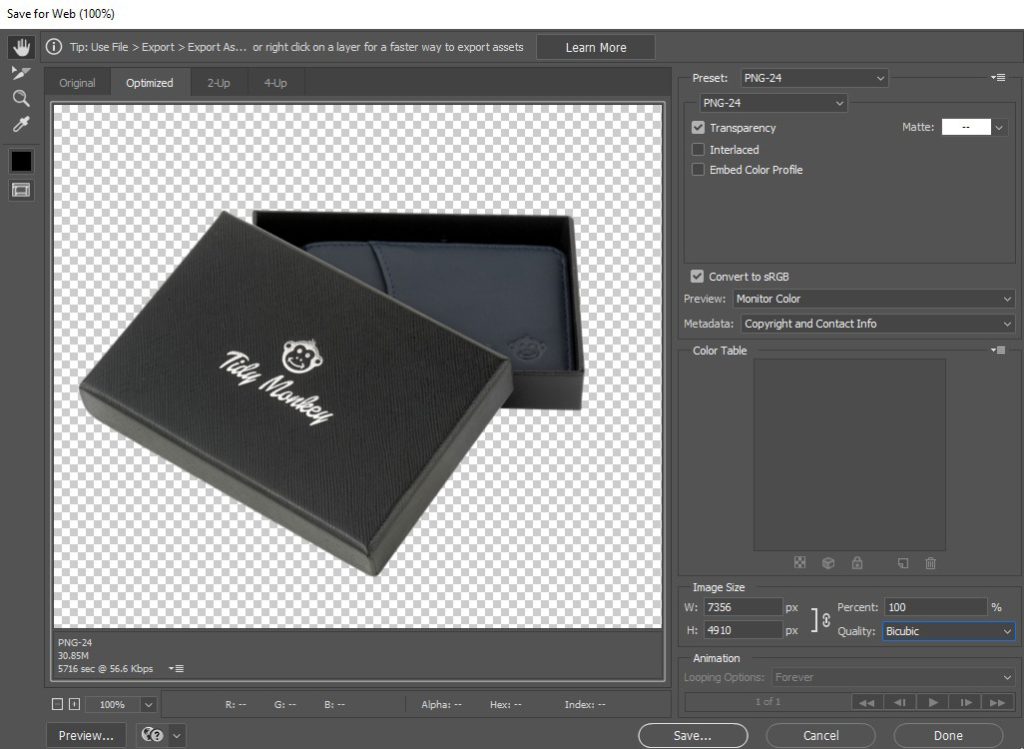
To create your PNG-24 image format, while saving your image go to File> Extract and select Send As Option. A confirmation window will appear in your file where you will mark the “Transparency” box and your image file will be saved in PNG-24 format.
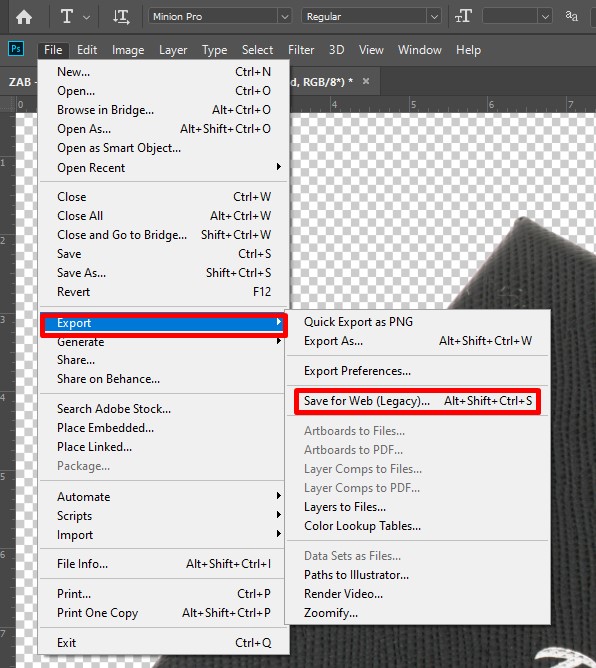
Pro Tip: When confirming a file format, also check the image file size. Heavy image files will slow down your store and consumers will be disappointed with the long loading speed. Try to keep the file size between 170 KB and 200 KB. If you are going to upload to an e-Commerce site like amazon check the image size of your product and follow the recommended image size defined in the amazon product image requirements.
Step 7: Save the file
After confirming all of the above now all you have to do is click the Remove All button. You will find a window where you choose where you want to save the file and while doing this make sure your image format appears in .png.

If all is well then presses the save button and with that, you now know how to make the picture background transparent into the success of any kind of image.

